
Ready to connect with the world in real-time? Broadcasting yourself on YouTube has never been easier, whether you're sharing your expertise, hosting an event, or just wanting to chat with your audience. This comprehensive guide will walk you through three different ways to broadcast yourself on YouTube, from the simplest smartphone setup to professional-grade streaming equipment.
Understanding YouTube Live Streaming
Before we dive into the how-to, let's understand what makes YouTube live streaming so powerful. When you broadcast yourself on YouTube, you're tapping into a platform that reaches billions of viewers worldwide. Whether you're teaching a skill, hosting a Q&A session, or sharing a special moment, live streaming creates an immediate connection that pre-recorded videos simply can't match.
The beauty of YouTube live streaming lies in its real-time interaction features. Your viewers can comment, ask questions, and engage with you instantly through live chat. This two-way communication transforms passive viewing into an active, community-building experience.
Getting Started: Meeting YouTube's Requirements
Before you can broadcast yourself on YouTube, you'll need to meet some basic requirements that ensure a smooth streaming experience:
Essential Requirements:
- Verified YouTube channel with your phone number linked
- At least 50 subscribers for mobile streaming
- No live streaming restrictions in the past 90 days
- Enabled live streaming feature (may take up to 24 hours to activate)
- Stable internet connection of at least 3 Mbps
For mobile users specifically, you'll need Android 5.0+ or iOS 8.0+ with the latest YouTube app installed. Don't worry if you're starting from scratch, we'll cover exactly how to set everything up.
Option 1: Broadcasting from Your Smartphone
Your smartphone is the most accessible way to broadcast yourself on YouTube. With just a few taps, you can go live and reach your audience anywhere, anytime.
Step-by-Step Smartphone Broadcasting
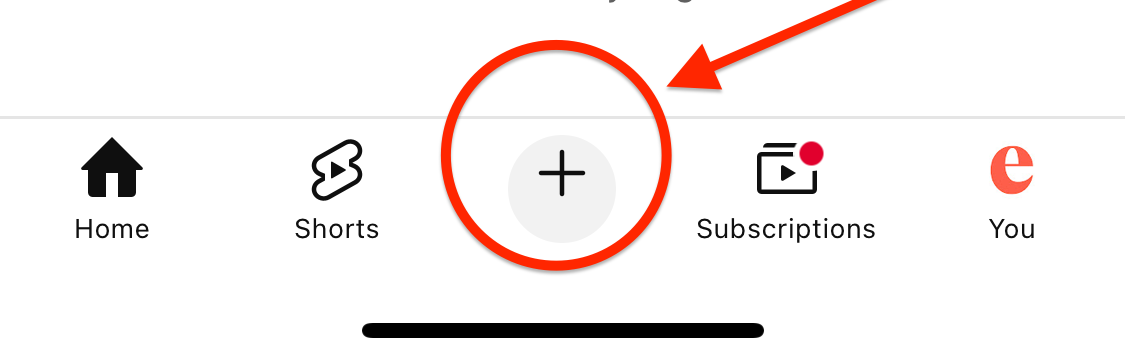
Step 1: Open the YouTube App
Launch the YouTube app on your phone and ensure you're logged into your channel. Look for the "+" symbol at the bottom center of your screen.
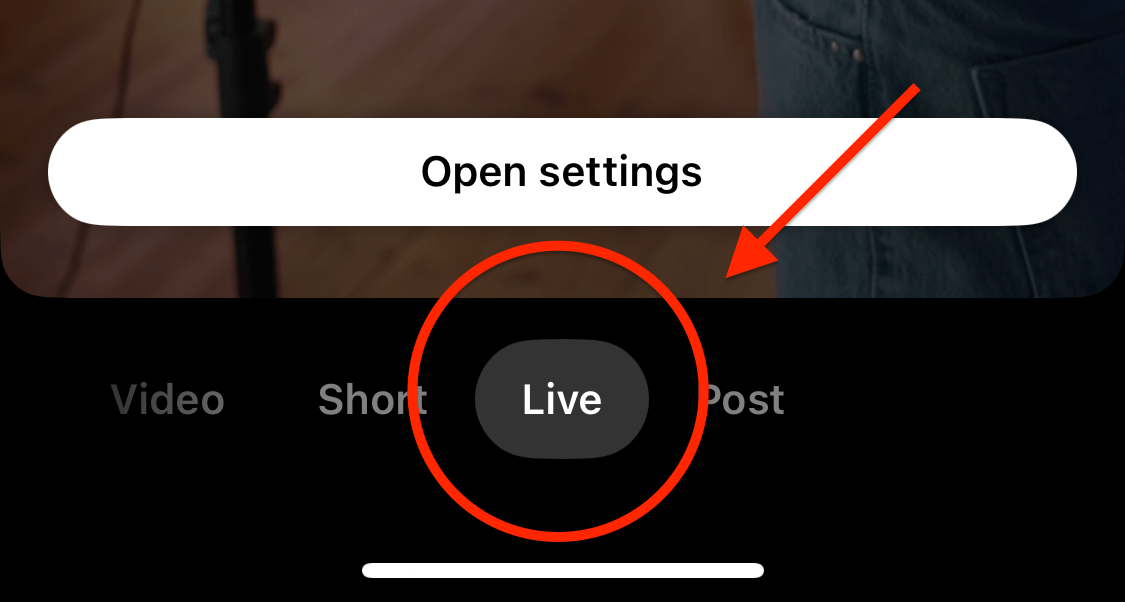
Step 2: Access Live Streaming
Tap the "+" button, then select "Live" from the menu options. If this is your first time, YouTube may need a moment to process your request.
Step 3: Set Up Your Stream
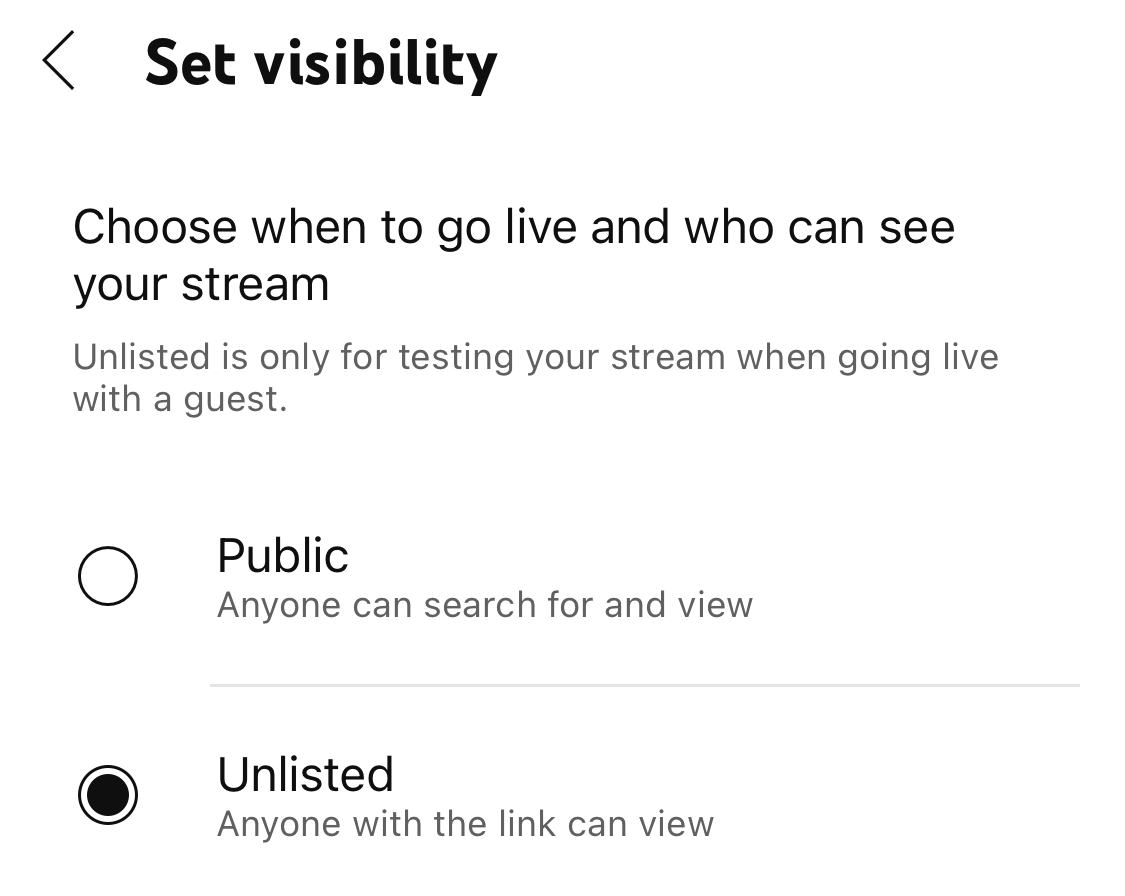
Here's where you customize your broadcast:
- Add a compelling title that describes what you're streaming
- Choose your privacy settings (Public, Private or Unlisted)
- Set your audience (Made for Kids or not)
- Schedule for later if you want to plan ahead
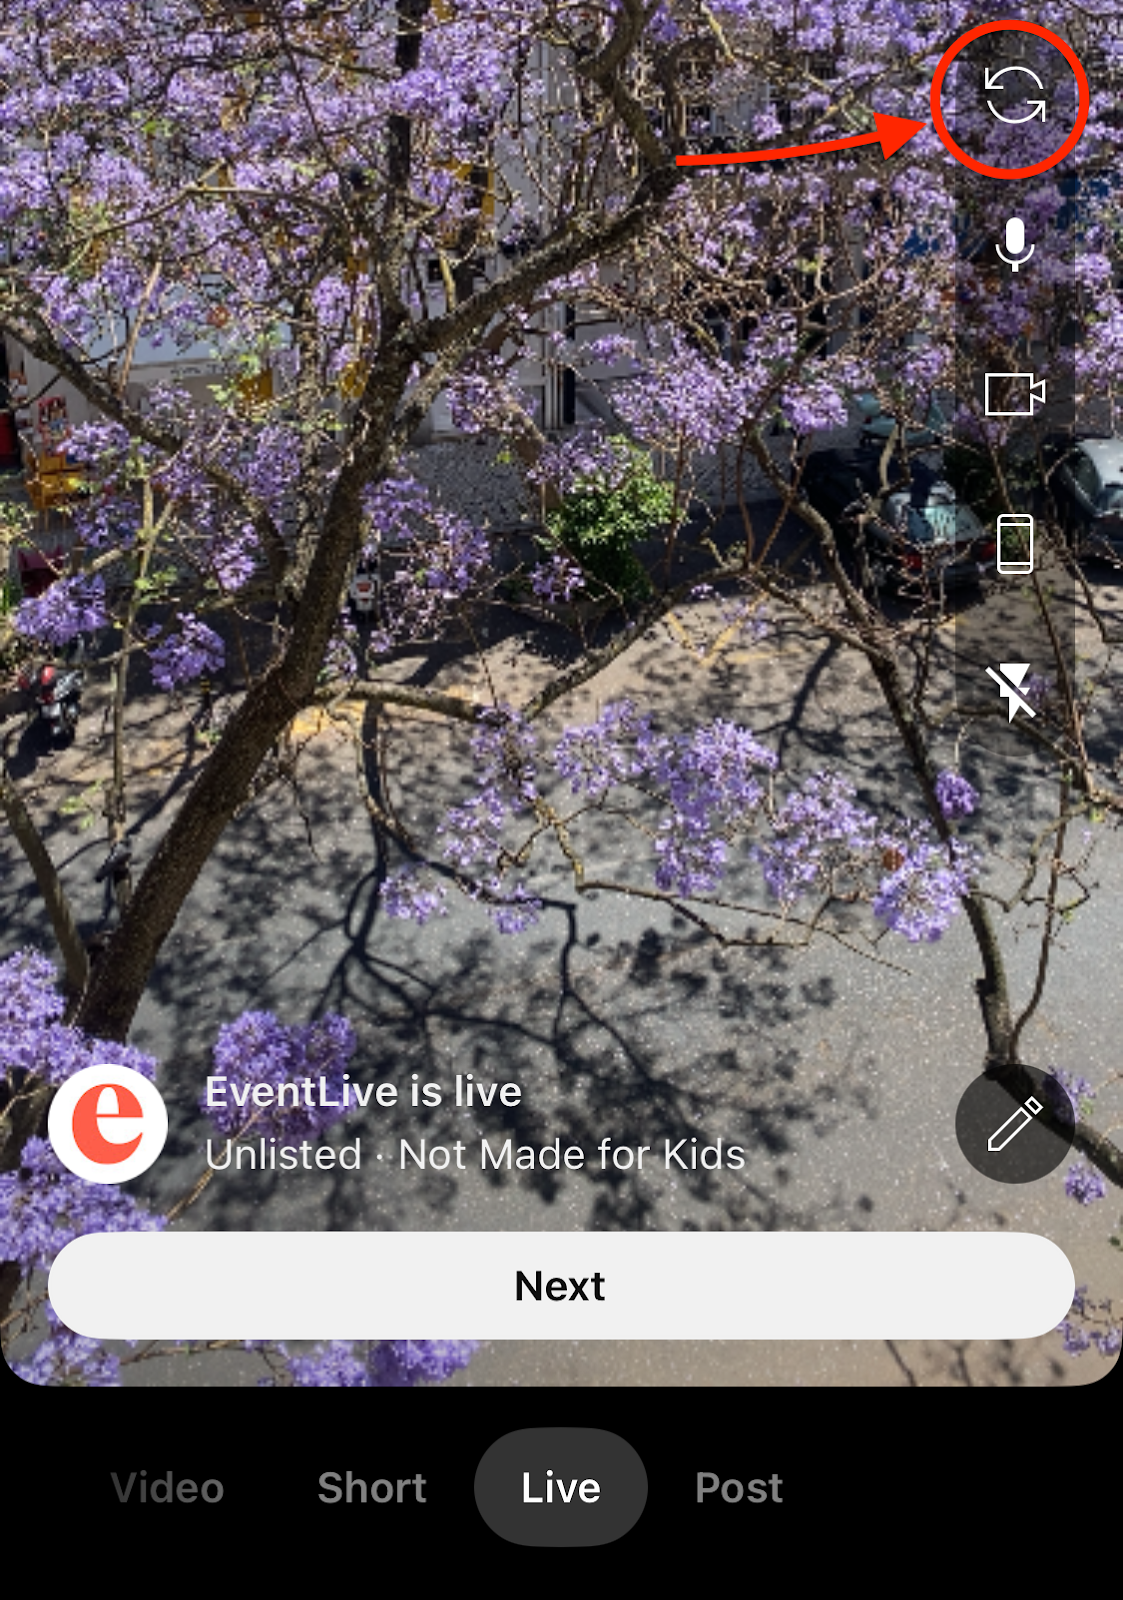
Step 4: Configure Your Camera
Your phone will default to the front-facing camera, but you can switch between front and back cameras using the circular arrow icon. Position your phone horizontally for a traditional widescreen view or vertically for YouTube Shorts-style streaming.
Step 5: Go Live
Once everything looks good, tap "Go Live". Your subscribers will receive a notification, and you'll see a red "LIVE" indicator confirming your broadcast is active.
Step 6: Interact and Engage
During your stream, engage with viewers through the live chat. Answer questions, acknowledge comments, and build that real-time community connection that makes live streaming so powerful.
Step 7: End Your Stream
When you're ready to finish, tap the "X" button and confirm you want to stop streaming. Your stream will automatically be saved as a video on your channel for later viewing.
Why EventLive Might Be Your Better Choice
While YouTube is excellent for public broadcasting, sometimes you want to broadcast yourself to a more intimate audience. This is where EventLive shines as a superior alternative for personal and private events.
EventLive offers unique advantages:
- Private, customizable event links that you control completely
- No subscriber requirements - anyone can start broadcasting immediately
- Pay per View Option
- No account needed for viewers - they just click your private link
- Automatic reminders sent to your guest list
- 365-day replay availability for your broadcasts
- High-quality recording automatically saved
- Virtual guestbook for viewer messages
Imagine broadcasting your wedding, graduation, or family reunion without worrying about YouTube's public nature or algorithm. EventLive creates a bridge between you and your loved ones, ensuring that distance never prevents them from sharing your important moments.
Option 2: Broadcasting from Your Laptop with Webcam
Ready to step up your broadcasting game? Using your laptop with a webcam gives you more control over your stream setup and better tools for managing your broadcast.
Setting Up Webcam Broadcasting on YouTube
Step 1: Enable Live Streaming
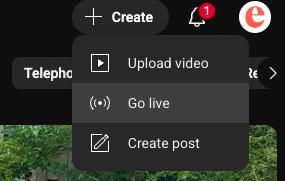
Visit YouTube Studio and click the "Create" button, then select "Go Live". If this is your first time, you'll need to wait up to 24 hours for the feature to activate.
Step 2: Choose Webcam Streaming
On the live streaming dashboard, select "Webcam" from the streaming options. This built-in option requires no additional software and works with most modern web browsers.
Step 3: Configure Your Broadcast Details
Fill in your stream information:
- Title: Make it searchable and descriptive
- Description: Explain what viewers can expect
- Privacy settings: Choose Public, Unlisted, or Private
- Thumbnail: YouTube will capture one automatically, or upload your own
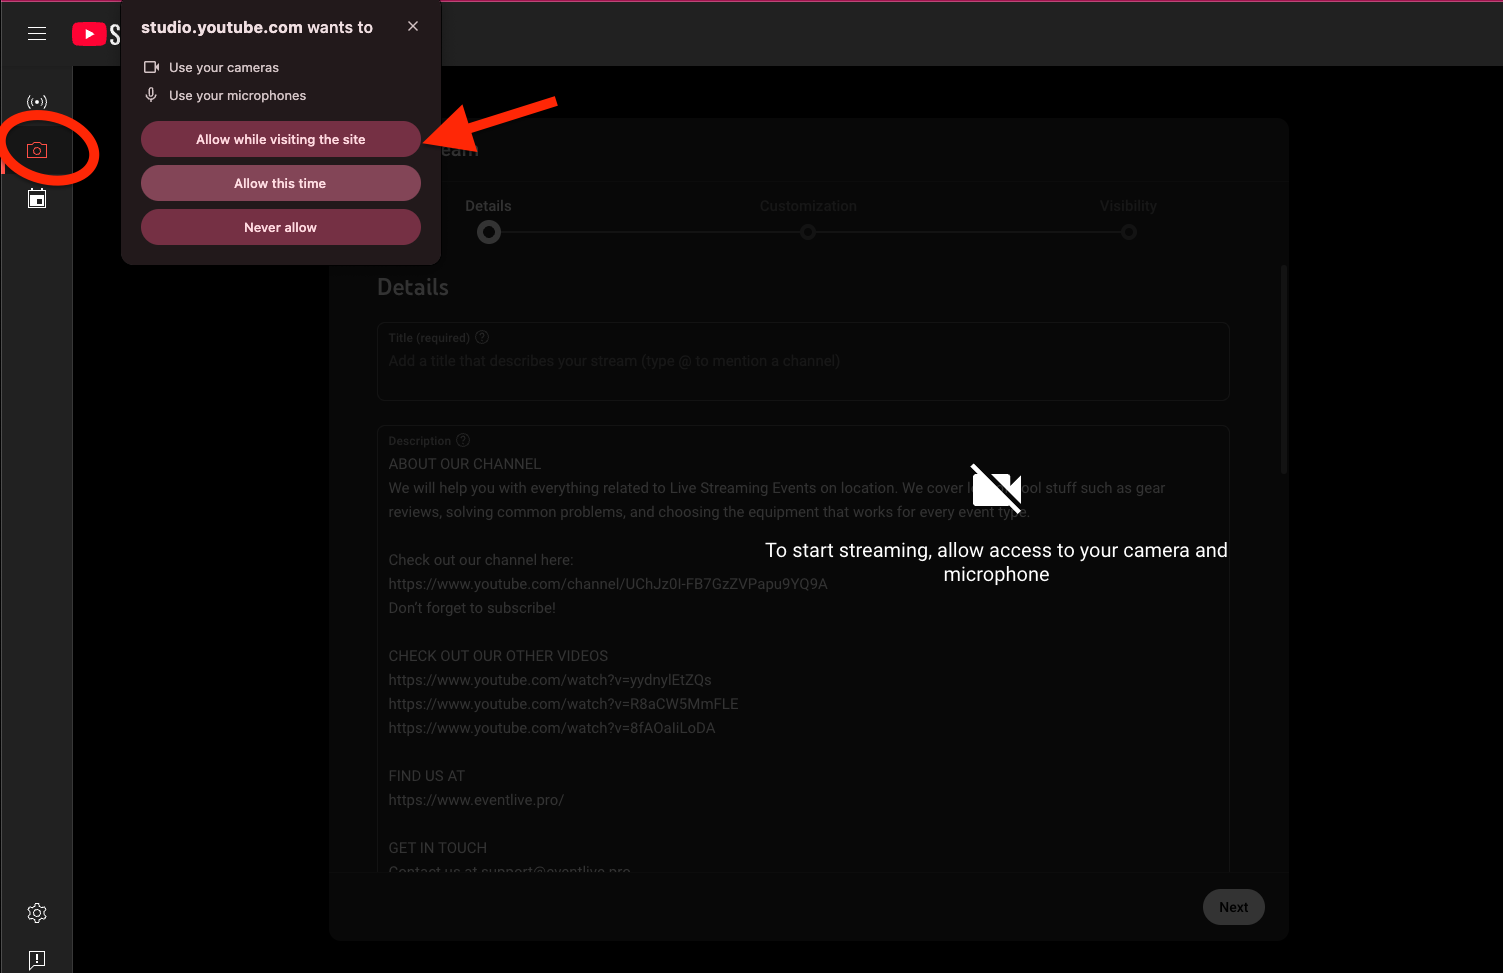
Step 4: Grant Camera and Microphone Access
Your browser will request permission to access your camera and microphone. Click "Allow" to proceed. If you have multiple cameras or microphones, select the ones you want to use.
Step 5: Test Your Setup
Before going live, test your camera angle, lighting, and audio. Good lighting makes a huge difference - position yourself facing a window or invest in a simple ring light. Ensure your microphone picks up clear audio without background noise.
Step 6: Advanced Settings (Optional)
Click "More Options" to access:
- Live chat settings: Enable, disable, or moderate comments
- Monetization options: If your channel qualifies
- Stream scheduling: Set a specific start time
- Category selection: Help viewers find your content
Step 7: Go Live
When everything looks perfect, click "Go Live". Your stream will start immediately, and you'll have access to real-time analytics and chat management tools.
Optimizing Your Webcam Setup
Lighting Tips:
- Position your primary light source in front of you
- Avoid backlighting from windows behind you
- Use soft, diffused lighting to minimize harsh shadows
Audio Considerations:
- Test your microphone levels before going live
- Choose a quiet environment to minimize background noise
- Consider using headphones to prevent audio feedback
Camera Positioning:
- Place your camera at eye level for the most flattering angle
- Ensure a clean, non-distracting background
- Leave some headroom above your head in the frame
Option 3: Professional Broadcasting with OBS Studio and Camera - Maximum Quality
For those serious about broadcasting yourself on YouTube with professional quality, OBS Studio combined with a dedicated camera offers unlimited creative possibilities.
What is OBS Studio?
OBS (Open Broadcaster Software) Studio is a free, open-source application that gives you complete control over your live streams. It allows you to combine multiple video sources, add graphics, manage audio levels, and create professional-looking broadcasts that rival television quality.
Setting Up OBS Studio for YouTube
Step 1: Download and Install OBS Studio
Visit the official OBS website and download the software for your operating system. Installation is straightforward and takes just a few minutes.
Step 2: Get Your YouTube Stream Key
In YouTube Studio, navigate to the live streaming section and select "Stream Software". Copy your unique stream key – this is like a password that connects OBS to your YouTube channel.
Step 3: Configure OBS Settings
Open OBS and go to Settings > Stream:
- Select "YouTube - RTMPS" as your service
- Choose "Use Stream Key"
- Paste your YouTube stream key
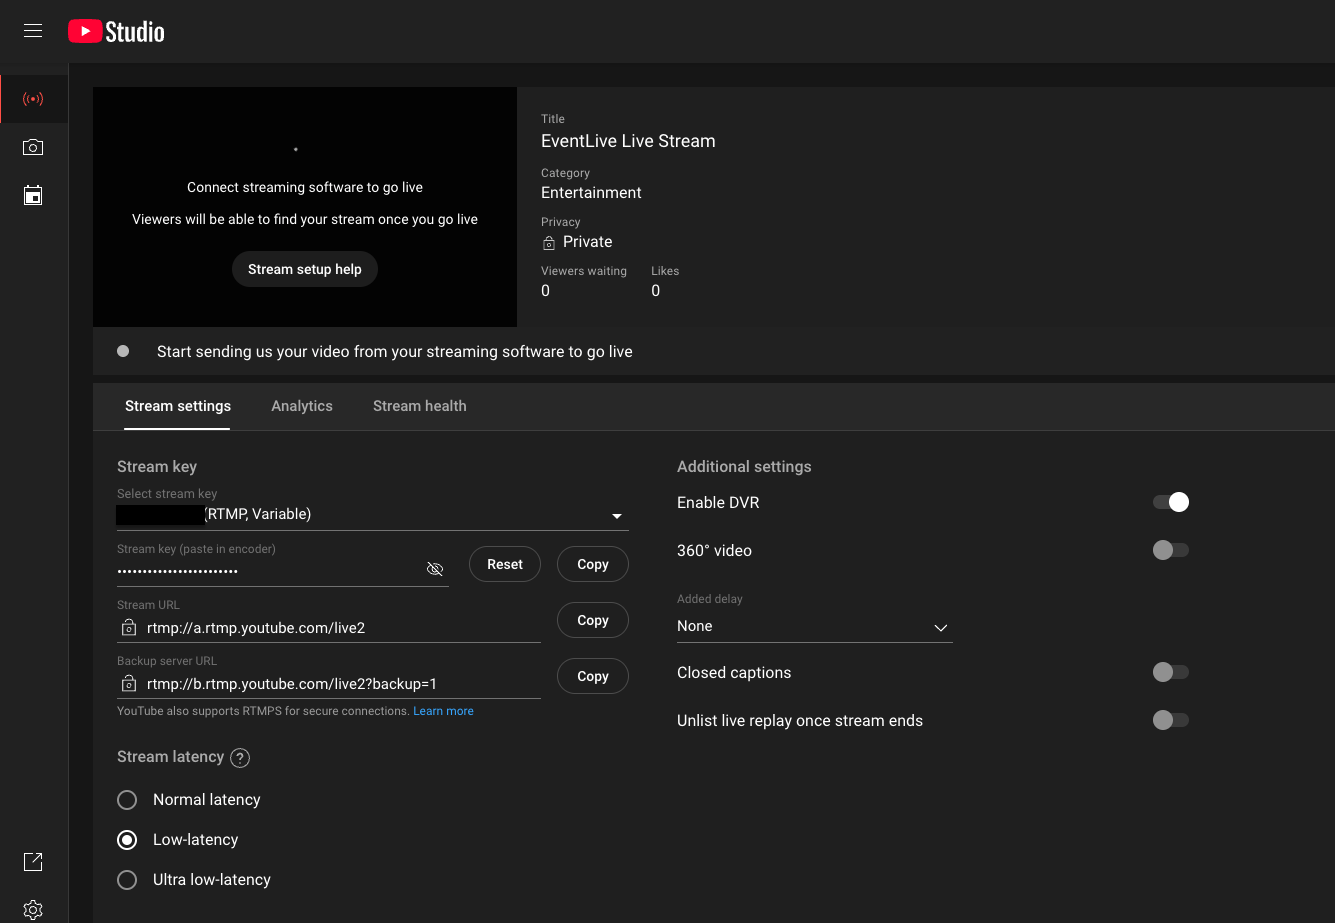
- Click "Apply" and "OK"
Step 4: Add Your Camera Source
In OBS, add a video source:
- Click the "+" in the Sources box
- Select "Video Capture Device"
- Name it "Camera" and click "OK"
- Choose your camera from the device dropdown
- Set resolution to 1920x1080 for high-quality streaming
- Set frame rate to 30 FPS (or 60 FPS for gaming)
Camera Options for Professional Broadcasting
Webcam Setup:
Connect your webcam via USB and select it in OBS. Most modern webcams work plug-and-play, though you may want to adjust settings for optimal quality.
DSLR Camera Setup:
For professional quality, use a DSLR camera:
- Connect your DSLR to a capture card via HDMI
- Connect the capture card to your computer via USB
- Select the capture card as your video source in OBS
Advanced OBS Features
Multiple Scenes:
Create different scenes for various parts of your broadcast - perhaps one with just your camera, another with screen sharing, and a third with graphics and overlays.
Audio Management:
OBS allows you to mix multiple audio sources, add filters to reduce background noise, and ensure perfect audio levels for your broadcast.
Graphics and Overlays:
Add professional touches like:
- Lower thirds with your name and social media handles
- Background music between segments
- On-screen graphics and animations
- Brand logos and watermarks
Pro Tips for Successful Broadcasting
Regardless of which method you choose to broadcast yourself on YouTube or EventLive, these tips will elevate your streaming quality:
Technical Excellence
Internet Stability:
- Use a wired connection when possible for maximum stability
- Test your upload speed - aim for at least 3 Mbps, preferably 5-10 Mbps
- Close unnecessary applications to free up bandwidth
- Have a backup internet option (mobile hotspot) ready
Audio Quality:
Audio often matters more than video quality. Poor audio will drive viewers away faster than imperfect video:
- Invest in a quality microphone or headset
- Test audio levels before going live
- Use headphones to monitor your sound
- Minimize background noise and echoes
Visual Appeal:
- Ensure good lighting - your face should be clearly visible
- Check your background - keep it clean and non-distracting
- Position your camera at eye level for the most flattering angle
Common Troubleshooting
Connection Issues:
- If your stream drops, don't panic - restart and explain briefly
- Monitor your streaming software for alerts about connection quality
- Have phone numbers or backup communication methods for important streams
Audio/Video Sync Problems:
- Test your setup thoroughly before important broadcasts
- Restart your streaming software if sync issues occur
- Check that all devices are using the same frame rate settings
Key Takeaways
- Start simple with smartphone broadcasting, then upgrade as you gain experience and confidence
- YouTube requires 50 subscribers for mobile streaming, but EventLive has no restrictions
- WebCam streaming offers a good middle ground between simplicity and control
- OBS Studio provides professional-level control but requires more technical knowledge
- Audio quality is crucial - invest in good microphones before expensive cameras
- Stable internet connection is essential for successful broadcasting
- Practice and consistency are key to building a successful broadcasting presence
- Engage with your audience to create meaningful connections and community
- Plan your content, but stay flexible enough to respond to audience interests
Frequently Asked Questions
1. How many subscribers do I need to broadcast myself on YouTube?
You need at least 50 subscribers to broadcast from your mobile device. However, anyone can broadcast from a computer using YouTube's webcam feature, regardless of subscriber count.
2. Can I broadcast myself on YouTube for free?
Yes! YouTube live streaming is completely free. You only need a YouTube account and to meet their basic requirements. EventLive also offers broadcasting capabilities with different pricing tiers for various features.
3. Do I need special equipment to broadcast myself?
Not necessarily! You can start with just your smartphone for basic broadcasting. As you grow, you might want to invest in better cameras, microphones, and lighting equipment for improved quality.
5. How long does it take for YouTube live streaming to activate?
After enabling live streaming on your channel, it can take up to 24 hours for the feature to become active. Plan ahead if you have a specific streaming schedule.
6. Can I schedule my broadcasts in advance?
Yes! Both YouTube and EventLive allow you to schedule broadcasts for future dates. This helps you promote your stream and ensures your audience knows when to tune in.
7. What internet speed do I need for broadcasting?
Aim for at least 3 Mbps upload speed for stable streaming, though 5-10 Mbps is better for higher quality. Test your connection speed before important broadcasts.
8. Can I save my live broadcasts for later viewing?
YouTube automatically archives streams under 12 hours. EventLive provides 365-day replay availability for all broadcasts. Both platforms let you edit or delete saved streams.
9. What should I do if my broadcast gets interrupted?
Stay calm and restart your stream if possible. Brief interruptions happen to everyone. For important events, consider having a backup internet connection or streaming simultaneously to multiple platforms for redundancy.
Broadcasting yourself has never been more accessible or powerful. Whether you choose YouTube's massive reach or EventLive's intimate privacy, you now have the tools and knowledge to share your voice with the world.
Remember, every expert was once a beginner. Start with simple smartphone broadcasting to build your confidence, then gradually explore more advanced options as your skills and ambitions grow. The most important step is the first one: getting started.
Your story matters. Your voice deserves to be heard. Your moments are worth sharing.
.png)
