

As we move further with technology, live streaming continues to be a powerful way to engage with audiences and share your message. But with so many camera options on the market, it can be tough to know where to start.
In this guide, we'll break down everything you need to know about live streaming with cameras in 2024. We'll cover the different types of cameras available, their pros and cons, and what features to look for. Plus, we'll share some tips for getting the most out of your live streams, no matter what camera you choose.
Let's dive in!
Types of Cameras for Live Streaming
When it comes to choosing a camera for live streaming, you've got a few main options:
1. Camcorders

Camcorders are designed specifically for video, so they're a solid choice for live streaming. They usually come with built-in zoom lenses and external microphone inputs, which can be handy for capturing high-quality audio. On the downside, camcorders can be a bit bulky compared to other camera types.
2. DSLRs and Mirrorless Cameras

If you're serious about live streaming, a DSLR or mirrorless camera is the way to go. These cameras offer excellent video quality, interchangeable lenses for different looks, and full manual control over your image.
The catch? DSLRs and mirrorless cameras can be pricey, especially when you factor in the cost of lenses and other accessories. They also require a bit more technical know-how to operate than simpler camera types.
3. Webcams

Webcams are the simplest and most affordable option for live streaming. They're easy to set up - just plug them into your computer's USB port and you're ready to go.
However, webcams have some significant limitations. They have fixed lenses and no manual controls, so you're stuck with the image they give you. And the video quality is usually much lower than what you'd get with a dedicated camera.
Why Live Stream with Cameras?
So why bother with a dedicated camera for live streaming? Why not just use your smartphone?
There are a few key reasons:
Super zoom lens for close-up shots: Many cameras, especially camcorders and DSLRs/mirrorless cameras, have powerful zoom lenses that let you get up close and personal with your subject. This is great for events where you can't be right next to what you're filming.
Better low-light performance than smartphones: Dedicated cameras usually have larger sensors than smartphone cameras, which means they perform better in low light. If you're live streaming in a dimly lit venue, a real camera can be a lifesaver.
When to Stick with Smartphones

That said, there are definitely situations where sticking with your smartphone makes sense:
One-off events or limited budget: If you're only live streaming occasionally, or you're on a tight budget, using your smartphone is a smart way to get started without breaking the bank.
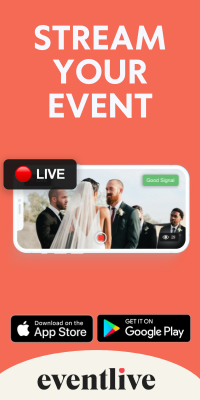
Easy-to-use apps like EventLive make it easy to create professional-looking live streams right from your smartphone. So for casual streams, you may not need a separate camera at all.
Requirements for Live Streaming Cameras
If you do decide to use a dedicated camera for live streaming, there are a few key features to look for:
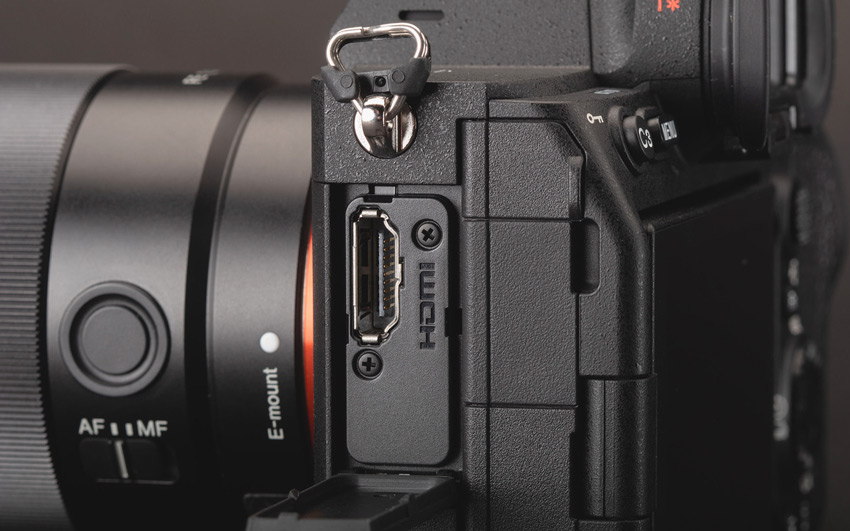
Clean HDMI output for connecting to a computer or encoder: To live stream with your camera, you'll need to connect it to a computer or hardware encoder. Look for a camera with a "clean" HDMI output, meaning one that outputs only the video signal without any camera interface elements.
USB output for webcam functionality: Some cameras can function as high-quality webcams when connected to a computer via USB. This is super handy for simple live streaming setups.
Connecting Your Camera
There are two main ways to connect your camera to your computer for live streaming:
USB: Some cameras can be connected directly via USB, which allows them to function as webcams. This is a simple, plug-and-play solution - just connect the camera to your computer and select it as a video source in your streaming software. Depending on your camera, you might have to add a download a separate driver.
HDMI: Most cameras have an HDMI output, which can be connected to your computer using a capture card. The capture card converts the HDMI signal into a digital video feed that your computer can recognize. One of the most popular capture cards is Elgato Cam Link. For more budget-friendly option consider Kondor Blue capture card.
Choosing a Streaming Platform
When it comes to actually sending your video out to the world, you've got a few different live streaming platforms to choose from:
YouTube Live and Facebook Live for a large existing audience: If you already have a following on YouTube or Facebook, streaming there is a great way to reach them. Both platforms make it easy to go live with just a few clicks.
Twitch for gaming and creative content: Twitch is the go-to platform for live streaming video games and creative pursuits like art and music. It has a built-in audience of millions of engaged viewers.
EventLive for any type of live event: EventLive is a powerful, user-friendly streaming platform. It offers features like customizable event pages, an option to go live multiple times throughout the day to the same link, and no need for the viewers to download anything or register.
Setting Up Your Live Stream
Once you've got your camera connected and your streaming platform chosen, it's time to set up your live stream:
Use encoding software like OBS Studio to create scenes and stream. Encoding software takes the video feed from your camera and encodes it into a format suitable for live streaming. OBS Studio is a popular free option that lets you create custom scenes with multiple video/audio sources, graphic overlays, and more. Check our a detailed guide on how to go live with OBS studio.
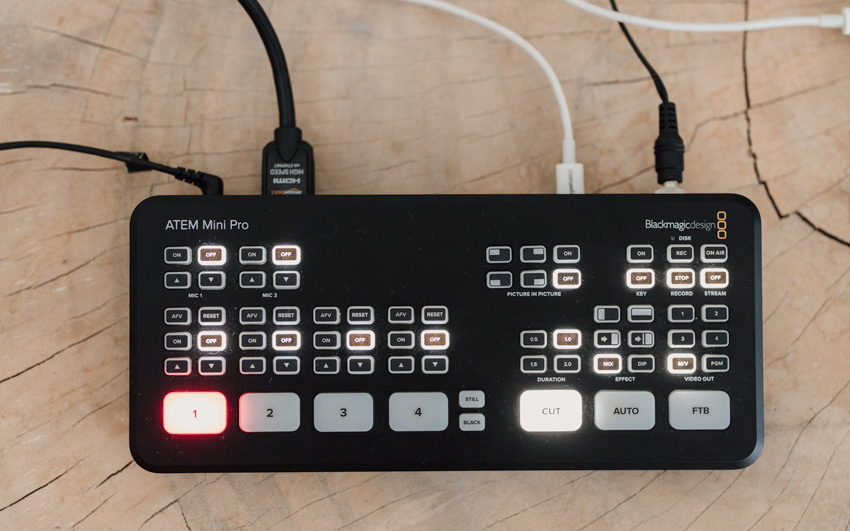
Alternatively, use a hardware encoder for portability. If you'd rather not involve a computer in your streaming setup, you can use a dedicated hardware encoder instead. These devices take in your camera's HDMI signal and encode it for streaming, without tying up your computer's processing power. Some of the popular choices for hardware encoders include Atem Mini and LiveU Solo.
Streaming with Multiple Cameras
Want to take your live streams to the next level? Try incorporating multiple camera angles:
Use an HDMI switcher for simple multi-cam setups: An HDMI switcher is a piece of hardware that lets you connect multiple HDMI video sources and switch between them on the fly. This makes it easy to cut between different camera angles during your live stream.
Integrate smartphones for cost-effective additional angles: No room in the budget for multiple high-end cameras? No problem - you can use smartphones as additional camera angles and connect them to your main streaming setup. Apps like NDI HX Camera, droidcam OBS, EpocCam turn your phone into a wireless video source. If you have a Mac and an iPhone, you can use Continuity Camera feature for free. More information in this guide.
Audio Setup
Good audio is just as important as good video for live streaming. Here are a few options for capturing top-notch sound:
Use camera's built-in mic, an external camera mic, or a separate mic connected to the computer or encoder. Most cameras have built-in microphones, but the audio quality is often lacking. For better results, use an external microphone that plugs into your camera or connect a separate mic to your computer/encoder.

Ensure audio is synced properly to avoid lip-sync issues. If your audio and video sources are separate, make sure they're properly synced. Even a slight delay between the two can be distracting for viewers. Software like OBS Studio has built-in tools for syncing audio and video.
Power and Battery
Don't let a dead battery ruin your live stream! Here's how to keep your camera powered up:
Have spare batteries or use an external power supply for long streams: If you're streaming for more than an hour or so, you'll likely need more juice than your camera's built-in battery can provide. Keep spare batteries on hand or use an external power supply to keep your camera running.
AC power adapters for fixed locations: If you're always streaming from the same spot, consider using an AC power adapter to plug your camera into a wall outlet. That way you'll never have to worry about running out of battery mid-stream.
Wireless Streaming Options
Want to stream without being tethered to your computer by a bunch of cables? Here are some ways to go wireless:
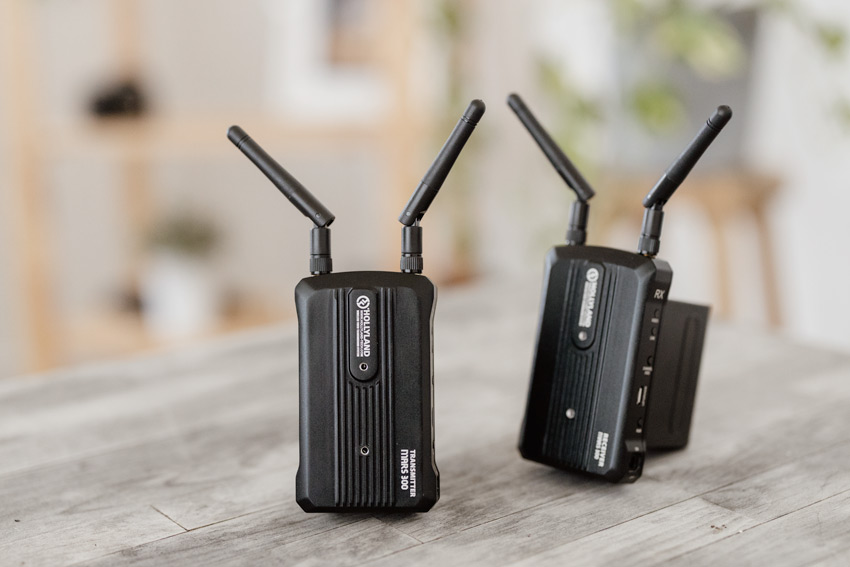
HDMI transmitters for wireless camera connection: HDMI transmitters use radio to send your camera's video signal to a receiver connected to your computer or encoder. This lets you position your camera freely without long cable runs. The most popular HDMI transmitter on the market is Hollyland Mars 300 Pro.
Built-in Wi-Fi streaming on some cameras: Some newer cameras have Wi-Fi connectivity and can stream directly to platforms like YouTube or Facebook over a wireless network.
Cellular bonding devices for remote streaming: For truly remote live streaming without access to Wi-Fi, you can use a cellular bonding device. These devices combine multiple cellular data connections into one robust stream, letting you broadcast from virtually anywhere with cell service. One of the most popular options is LiveU Solo.
Backup Recording
Even with a stable internet connection and plenty of power, technical hiccups can still happen during a live stream. That's why it's always a good idea to have a backup recording:
Record to the camera's memory card during streaming: Most cameras can record video to an internal memory card at the same time they're outputting a live signal. Enable this feature so you'll have a high-quality backup of your stream.
Use a hardware encoder's internal storage or an external drive: If you're using a hardware encoder, it may have a slot for an SD card or an SSD drive. Configure the encoder to record your stream to this storage as a fail-safe.
Enable local recording in your streaming software: Streaming software like OBS Studio can record your live stream locally to your computer's hard drive. Make sure to enable this feature and choose a recording quality that balances file size with video quality.
Common Issues and Solutions
Even with the best-laid plans, problems can still crop up during a live stream. Here are some common issues and how to solve them:
HDMI signal drops: Use high-quality cables and avoid strain on connectors. If your video feed drops out randomly, the culprit is often a loose or faulty HDMI cable. Use sturdy, well-shielded cables and make sure they're not being bent or tugged.
Audio sync problems: Connect mics to camera, whenever possible. Audio delay can be caused by differences in the processing times of your video and audio signals. Combat this by connecting mics to your camera instead of your computer. Use good cables to avoid unpleasant static noises or audio disconnects.
Camera overheating: Use external power and take breaks. Continuous use can cause cameras to overheat, especially in warm environments. Use an external power supply instead of your battery to reduce heat, and take short breaks when possible to let your camera cool down.

Autofocus hunting: Use manual focus or choose high-contrast focus points. Autofocus can struggle in low light or with subjects that lack contrast. In these situations, switch to manual focus or choose a focus point with a sharp edge between light and dark areas.
Low light: Use a wide aperture lens, increase ISO, or add lighting. Dimly lit scenes are tricky for any camera. You can let in more light by using a lens with a wide maximum aperture, boosting your camera's ISO (light sensitivity), or adding additional light sources.
Live streaming with cameras is a fantastic way to produce high-quality content and engage with your audience in real-time. While the array of equipment and software options can seem daunting at first, understanding a few key concepts will help you create a setup that works for you.
Remember, you don't need the fanciest gear to get started - even a smartphone can produce great results with the right techniques and accessories. The most important thing is to get out there and start streaming!
As you gain experience, you can experiment with different cameras, audio setups, and streaming platforms to level up your content. And if you're looking for an accessible, all-in-one streaming solution, don't forget to give EventLive a try.
Now get out there and start sharing your vision with the world - happy streaming!

