
*** Updated September 24, 2025
I’ll show you some items that can make your life easier when broadcasting events on location. Some of these are pretty affordable and can be used without a steep learning curve, which makes them ideal for most event live streamers.
To give you an idea of the things we'll discuss today, I'll make a simple list of the items you need to start live streaming events wirelessly. I will explain you how these work, and why you might want to try them out.
- Camera
- Wireless Transmitters + Receivers
- Microphone (Doesn't have to be wireless)
- Encoder and/or Laptop
After going through the basics, I will show you different wireless setups that you can build based on your needs and your budget.
Without further ado, let's jump right in.
Are wireless live streaming setups worth it?
There are many reasons to ditch some cables of your setup and replace them with portable alternatives. Here are a few of them:
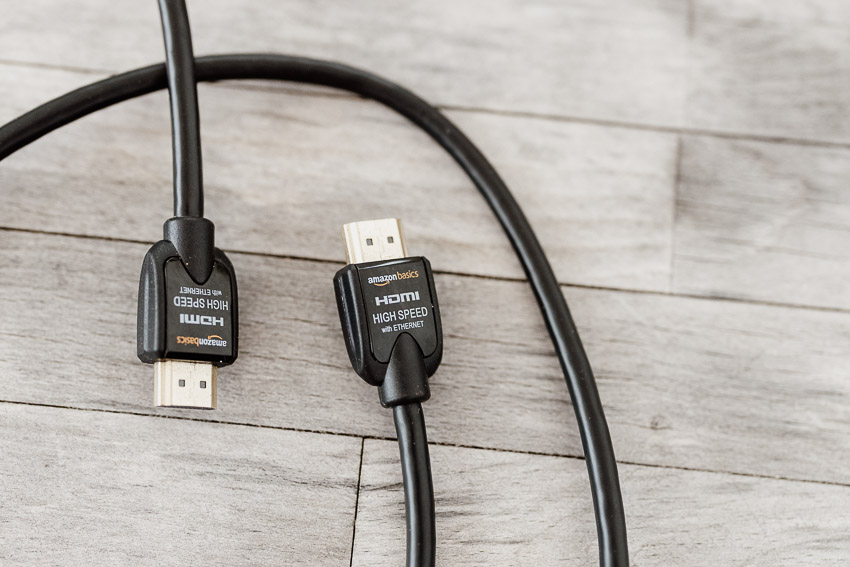
HDMI cables shouldn’t be used in long distances
As you might already know, your signal strength can decrease when you use long cables on your live streaming setup. This also happens with wireless alternatives, but the ones I’ll recommend today work reliably for more than 200 feet. An HDMI cable, for comparison, will start degrading your footage after 25 or 50 feet.
When using a wired setup, the quality of your cables can be more important than your cameras or microphones.
A good solution for this is to use SDI cables instead. Since the cameras that include SDI output ports cost several thousand dollars and are usually used for larger productions, I will not be recommending them in this guide. I will be discussing solutions for videographers working on location (at live events) using DSLR, Mirrorless, or similar cameras.
Moving across the venue shouldn’t be a two-person job
When you’re live streaming an event and you need to change the placement of your cameras, you need to be aware of the cables at all times.
With a wireless setup, all you need to do is double-check that you’re still in range and that there are not too many obstacles blocking your signal. Please keep in mind that walls, installations, etc. can interfere with the signal, so plan accordingly.
Cables on the floor can be problematic at some venues
I’m sure you’ve seen the viral videos of people dropping a wedding cake during the reception, or even falling into a pond during a ceremony. I’m not saying that this is caused by cables, but it could be. Cable management is a skill that should be learned and applied in every job. Fixing cables with colored tape and masking them when they shouldn’t be seen can take a long time, and it isn’t always possible.
When I have to live stream destination weddings, for example, cables are always in the way. I have to bury them under the sand to prevent guests from falling over, and it is something I’d rather not spend my time on, to be honest.
That’s when a wireless setup comes into play. You might have some questions, so let’s go through them.
Can you transmit video wirelessly?
The quick answer is yes, you can. All it takes is a 0.1s delay. It’s almost negligible. We’re talking about a 4-frame delay when compared to an HDMI cable.
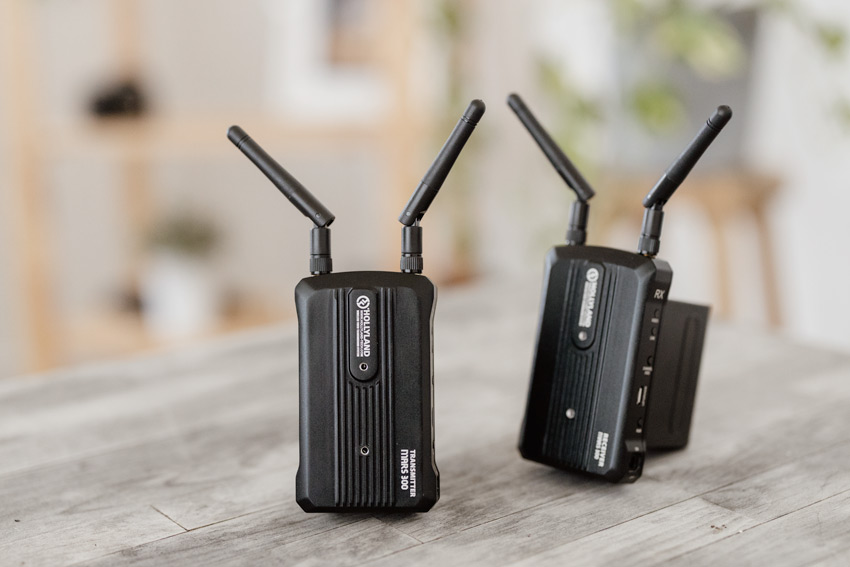
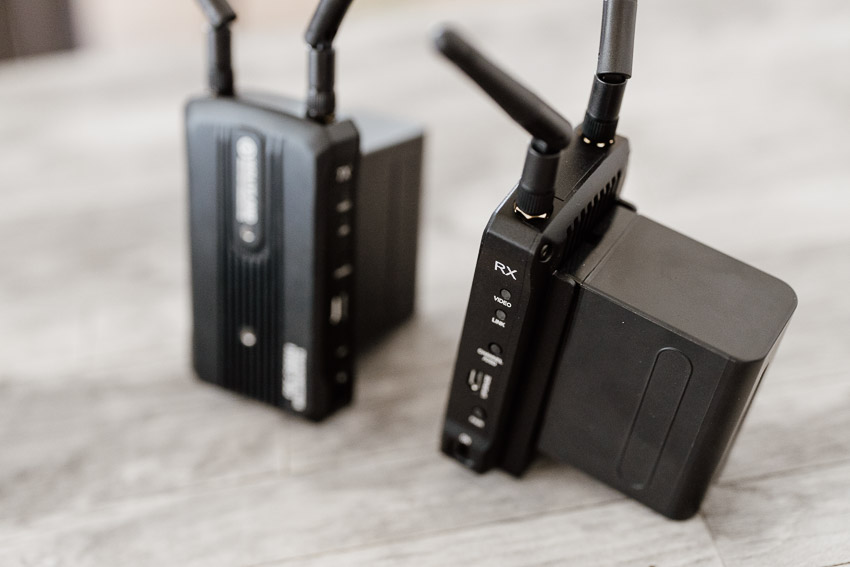
To live stream video wirelessly, you will need a Wireless Video Transmitter, such as the Hollyland Pyro H 4K. This isn’t a sponsored post, I just think this is the best tool for anyone trying to stream wirelessly without spending a fortune.
How does it work?
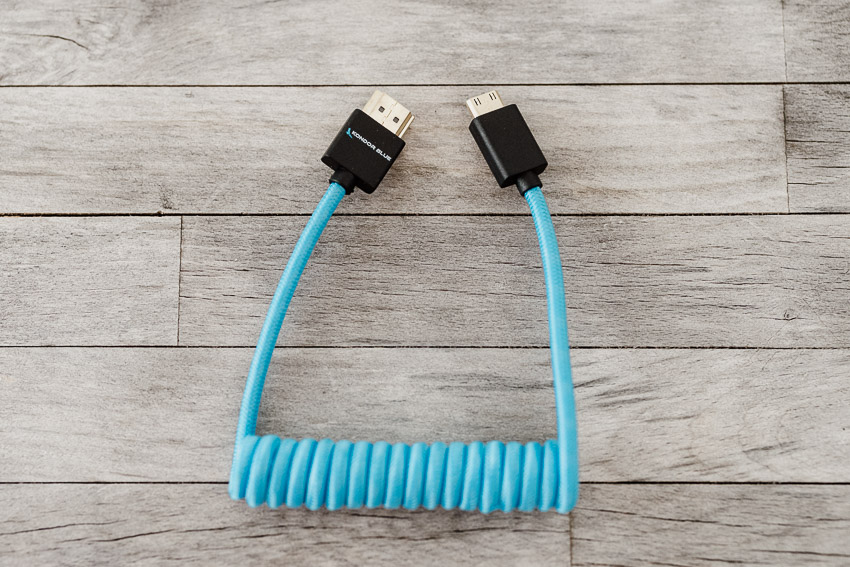
You need to connect your camera to the transmitter using an HDMI cable.
On the other end, you will have a receiver connected to your encoder or laptop, ready to go live.
Why this particular transmitter + receiver set?
The Hollyland Pyro H 4K works pretty much anywhere, and it takes very little room. It costs anywhere from 399 to 650 USD depending on the version you choose.
If you are a professional live streamer, you might want to consider the 400S Pro, which includes SDI ports. It also comes packed with useful features and a neat OLED screen for verifying channel interference and other things... but we’re talking about a more expensive product, which might be a little steep for your first wireless kit.
Hollyland Pyro H 4K: The good, the bad, and the ugly.
Let’s start with the best features of this transmitter: It works up to 400 feet away (in direct line of sight!) and you can monitor the feed from 3 different screens, including your smartphone with the Hollyview app.
The video signal is solid. It is one of those pieces of equipment that you can rely on.
Battery life is great (read more about this in the next paragraph…) and it usually lasts anywhere from 2 to 6 hours, depending on the size of batteries you choose.
The bad? Well, it isn’t really a negative. It’s just how the product works. It doesn’t include a battery. It uses the Sony NPF batteries that we all know (NPF550, 770, or 970). You might love them, but I hate them. I’ve been using them for years and I couldn’t find a single one that would work as expected after a few months of intensive use, so I keep replacing them.
Why is this bad? Because you need to charge more batteries before every event.
The negative is also a positive if you consider that you can simply buy 3 or 4 of them and just replace them during the event. NPF batteries are affordable and easy to find.
The ugly? Some of our videographers complained about the latency, but I didn’t find it to be a problem in most scenarios for my personal use (while live-streaming outdoor weddings).
Now that we discussed one key part of our kit, let’s move forward with the second one:
Which microphone is best for wireless live streaming?
There are many options to choose from, so I’ll recommend them based on your level of experience and your budget. Keep in mind that with audio, you’re not only paying for sound quality, but also for reliability, which is the most important thing in every streaming setup.
Entry Level
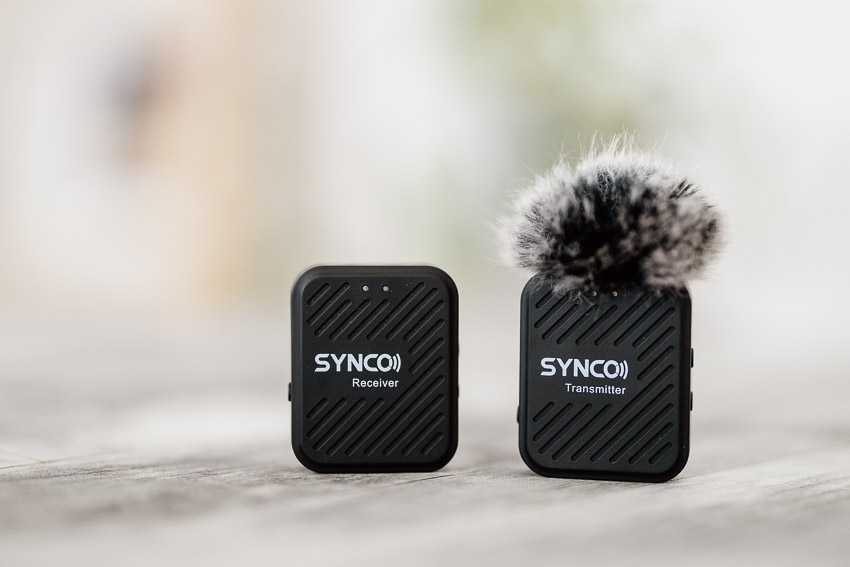
- Synco WAir-G2-A2: This wireless system is extremely affordable, at $99.
It can be clipped on a jacket or stand, as it is discrete and tiny.
The sound quality is really good for the price, but don’t expect the reliability of a higher-end system. It does work great within short distances and while maintaining line of sight at all times. We used these at live events with great success.
The best part about these? They have output monitoring, which really helps when you're testing audio at a live event.
Intermediate
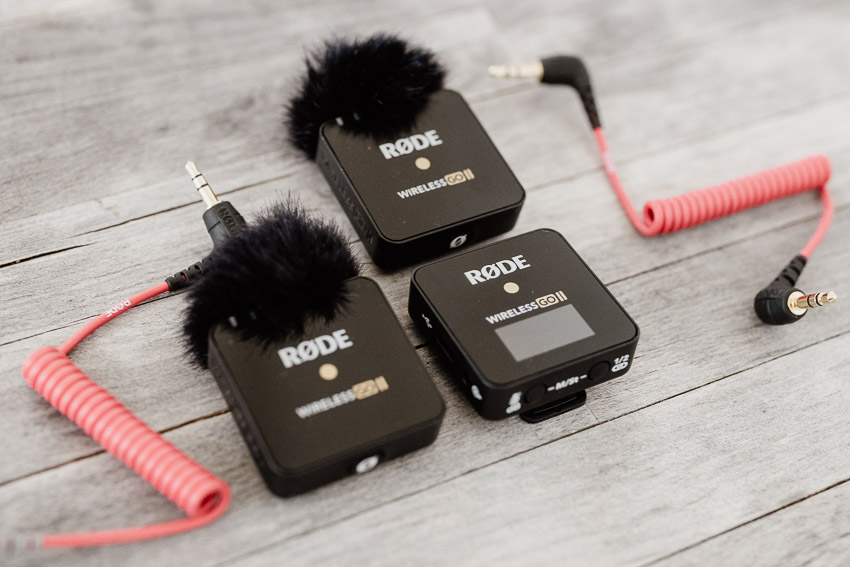
- Rode Wireless Go II: For $199 you get a proven system from a recognizable brand. Rode consistently delivers good quality and reliable microphones and these are no exception.
This lightweight wireless mic boasts 7 hours of battery life and great sound. It is the best choice for most videographers streaming events and I’ll keep recommending them to anyone looking for a good wireless mic with an affordable price tag.
We had good and bad experiences with these, but I still love them. The biggest drawback on a system like this is that in order to get good audio, you need to place them right within the frame or use a lavalier. Every time I placed them on a wedding officiant, they were visible from a distance. For best results, hide them, get rid of the wind muff and attach a lavalier to the person speaking.
Advanced
- Sennheiser EW 112P G4: You might be familiar with the Sennheiser EW (G2, G3, G4) as they are a staple on many professional videographers’ kits, and for a good reason.
These not-so-tiny microphones are extremely reliable up to 300 feet. They run on AA batteries, which are easily replaceable, and last up to 8 hours on a single charge.
You can’t go wrong with these, even at 600+ USD. They won’t let you down and they’re packed with neat features. Some of my favorites include the ability to scan frequencies before every event and choose the one with the least amount of interference. It’s small details like these that make a live stream perfect every time.
No matter which option you choose, make sure to test your audio before every event to make sure that you don’t have interference and that your microphones aren’t picking up too much background noise. You want the viewers to be able to focus on the speaker or the event going on, instead of the surroundings, which tend to be distracting.
Putting it all together: Broadcasting wireless video and audio
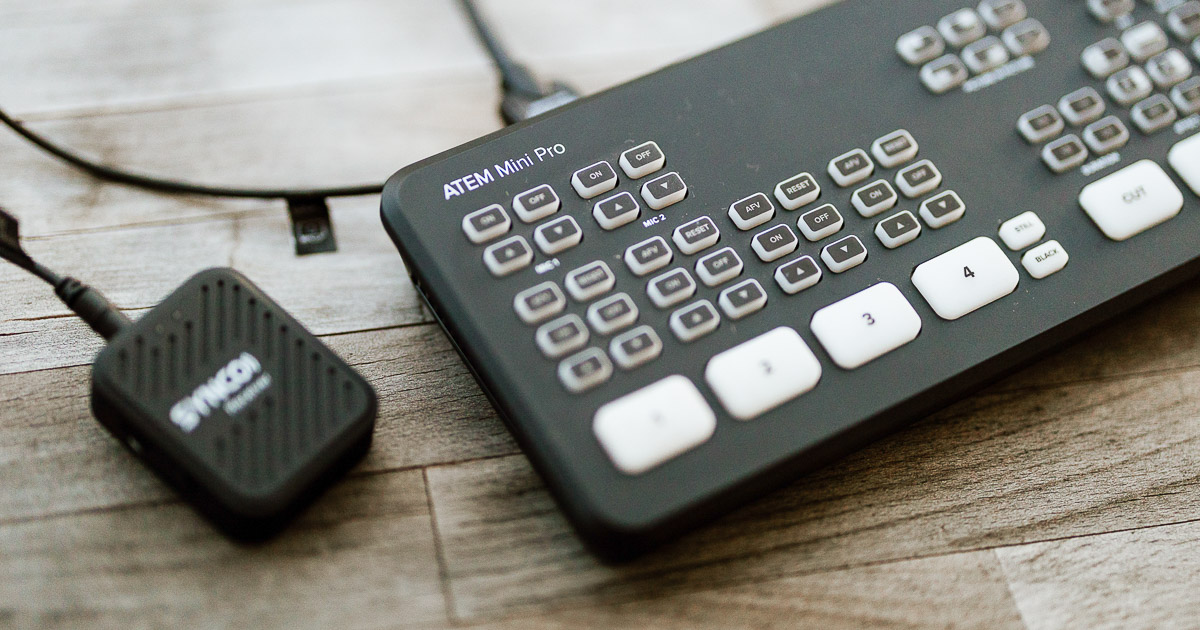
Now that you sorted out video and audio sources, you need to connect them to an encoder.
There are multiple options, such as ATEM Mini Pro, which is widely used by videographers. This encoder isn’t perfect, but it does work very well when the conditions are right.
It does require a monitor for switching, such as a Laptop or Smartphone. You could stream directly from it, without having to use OBS, but it isn’t something I’d do. I only recommend you to do so if the internet upload speed is fast and stable, and you have the time to fix any problems that may arise.
The basic setup, in this case, would look something like this:

- Camera: Rode wireless Go connected to the Microphone input / Hollyland Pyro H 4K transmitter connected to HDMI output.
- ATEM Mini: Hollyland Pyro H 4K receiver connected to HDMI Input.
- ATEM Mini: Output to Laptop using OBS.
- OBS: Using EventLive RTMP keys.
You can use alternative encoders such as YoloBox, or LiveU Solo, amongst others. They all have their pros and cons, but I won’t go into a detailed comparison in this post.
Most of them require a laptop with OBS installed and configured in order to go live. You’d simply have to add EventLive’s RTMP keys and schedule your event.
But... what if you don't want to use a laptop to go live?
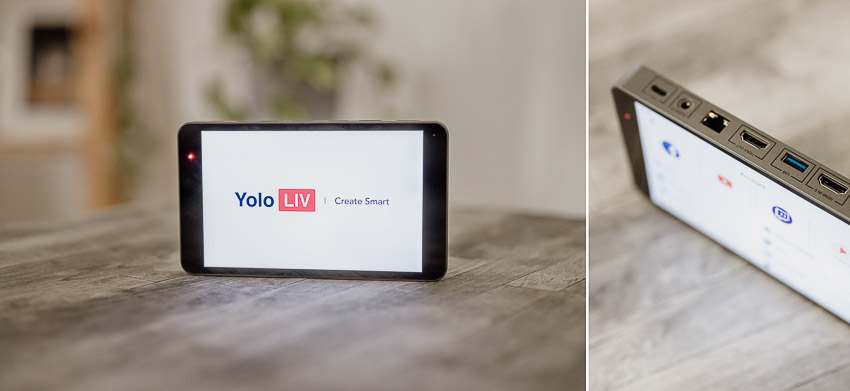
A clear exemption here is YoloBox, which features a built-in monitor that allows you to do everything on a single device. You can add EventLive's RTMP keys and you’re ready to go.
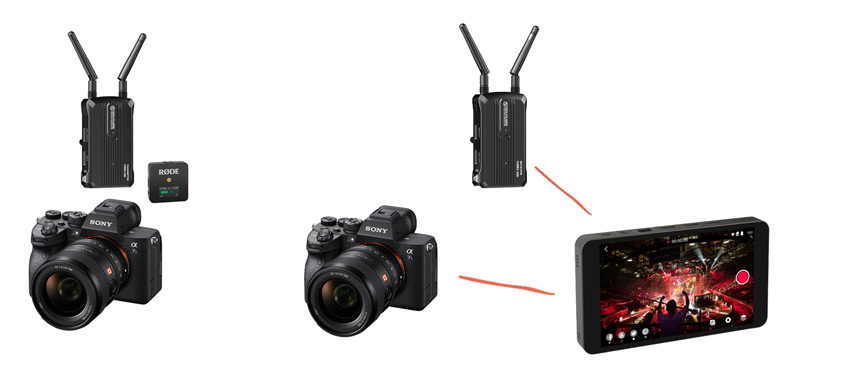
It would simplify a 2-camera setup and make it look like this:
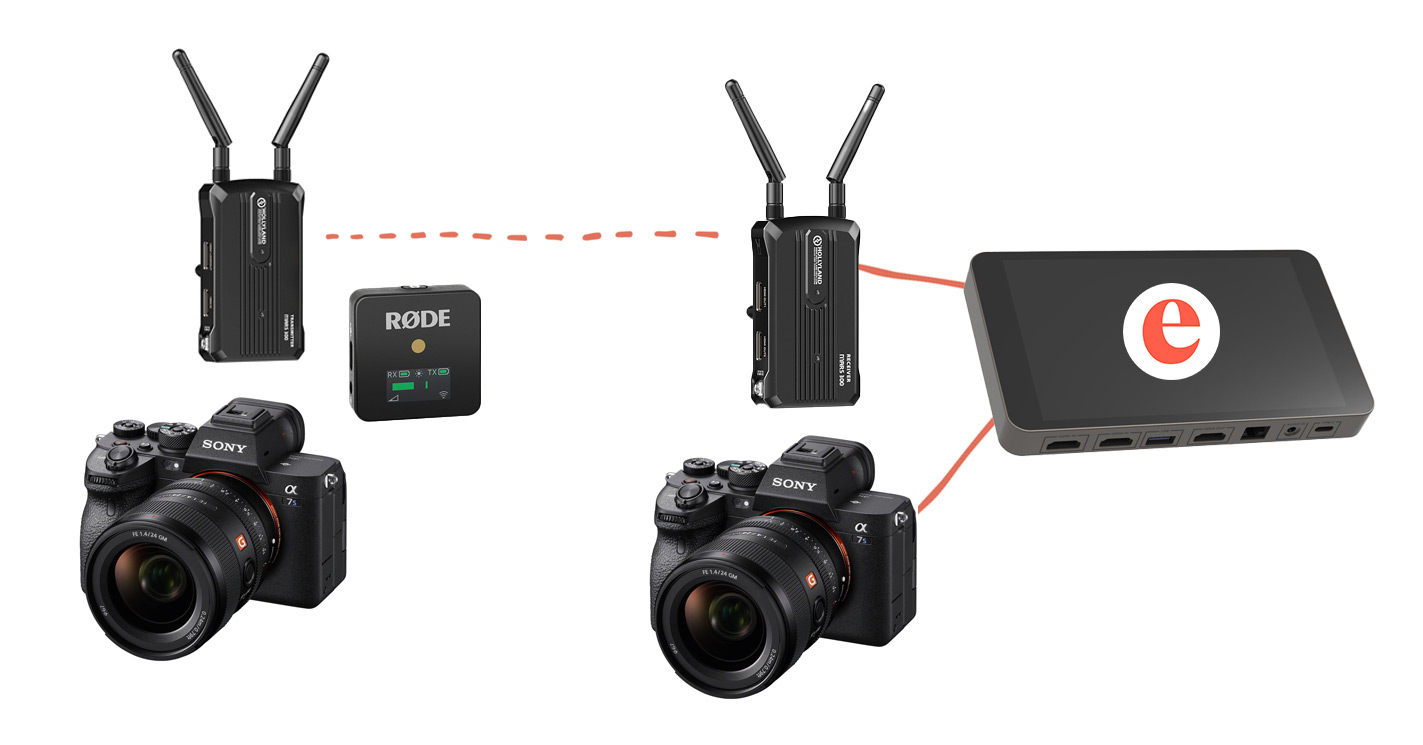
- 1st Camera: Rode wireless Go connected to the Microphone input / Hollyland Pyro H 4K transmitter connected to HDMI output.
- 2nd Camera: Hollyland Pyro H 4K receiver mounted on Hotshoe (not connected to the camera).
- YoloBox: Hollyland Mars 300 Pro receiver connected to HDMI Input.
- YoloBox: Using EventLive RTMP keys.
The benefits from this setup are clear. You won't need a table to set up an encoder and a laptop. It's portable and you can move it anywhere you need, as long as there's a good internet connection.
How much does a wireless streaming setup cost?
Let’s build a few live streaming kits so you can choose -and build- the one that fits your needs:
Single Camera Setups
Kit #1
- Camera
- Hollyland Mars 300 Pro
- Wireless Mic
- Capture Card
- Laptop with OBS
You can use your current camera for this setup. Add the Hollyland transmitters for $399, a Rode Wireless Go for $199 and use your laptop to live stream with OBS (Free). You will need a capture card to receive the Hollyland Pyro video signal and connect it to your laptop. A Camlink 4K is the best alternative at $130, but you can use a cheaper one for as little as $17.
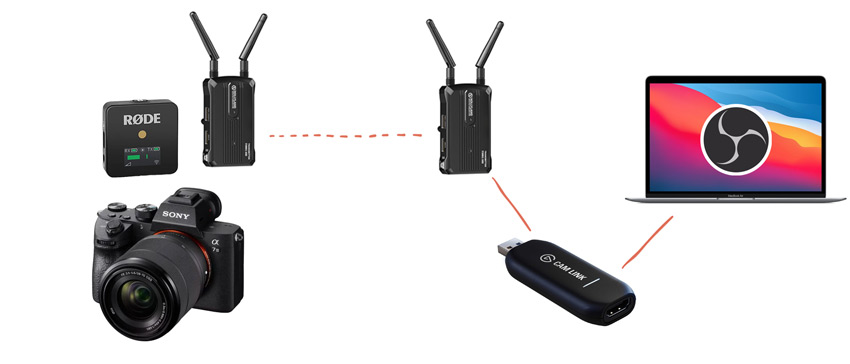
While the total cost might be higher with the camera and laptop, the investment for this setup is roughly 700 USD.
Kit #2
- Camera
- Wireless Mic
- YoloBox
Assuming you have a camera, you can get a wireless microphone for $99 to $199 and a switcher, such as YoloBox. You can opt for the $899 version or the YoloBox Pro for $1299.
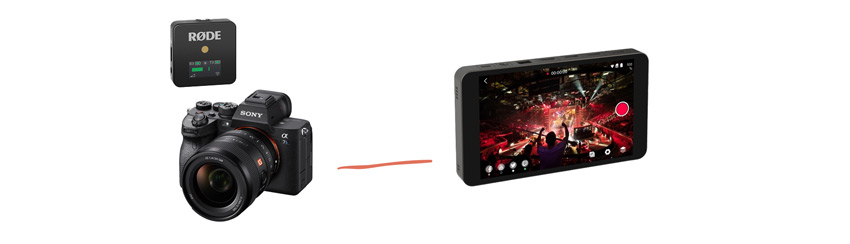
The investment for this setup adds up to $1000-1500 depending on the gear you choose.
Kit #3
- Camera
- Wireless Mic
- Android Phone
- CameraFi app
- Capture Card
This is a fantastic setup if you already own an Android phone or you don't mind getting one for this. It turns your smartphone into a live streaming device by plugging your camera using a capture card. You will need the CameraFi app, which is free to try but it comes with Ads. To use it for work, paying $79/year for it makes a lot of sense.
Any Android phone will do, but if you get a good one you can use the phone's camera to add a second angle to your stream. Great phones start at $400-500, so I'll include them in the budget. A capture card might cost anywhere between $17 to $130 and with a simple HDMI cable, you're good to go. To guarantee a clean and crisp audio, you might want to add a wireless mic, such as the Rode Wireless Go for $199, or a Synco Wireless Mic for as little as $79.
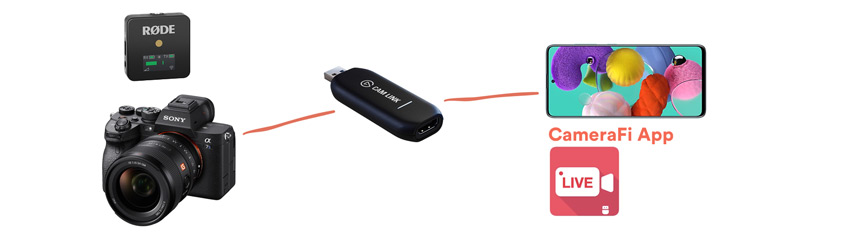
The total for this setup ranges between $500 to $1000, or as much as you'd like to spend on a phone, to be honest. If you already have an Android phone, I strongly recommend you to try it right away. Once you see how it works, you can go ahead and pay for a CameraFi subscription.
Alternative to CameraFi: USB Camera Pro sells for 5 bucks and it might be worth trying. We only used CameraFi with great results, that's why I'm recommending it.
2 Camera Setups
Kit #4
- 2 Cameras
- 2 Hollyland Pyro H 4K Kits (2 transmitters, 2 receivers)
- Wireless Mic
- ATEM Mini
- Laptop with OBS
The Hollyland 300 Pro kits will cost you 800-950 USD. For the wireless Mic, you can choose between a $99 or a $199 option, and then the ATEM Mini starts at $295. The Pro version for the ATEM Mini runs for $495 and it's worth it due to the ability to record the event.

In total, we're talking about $1200 for the basic setup and $1650 for the one I'd buy (Rode Wireless Go + Atem Mini Pro).
Kit #5
- 2 Cameras
- Hollyland Pyro H 4K (1 transmitter, 1 receiver)
- Wireless Mic
- YoloBox
The Hollyland kit will cost you 400-470 USD. You'd have to add $99-199 for a Wireless Mic, and 899-1299 USD for the YoloBox.
We're talking about $1400-$1950 for this 2-camera setup. I'm always assuming that you already have the cameras because recommending a specific live streaming camera would be a whole different blog post.
3 Camera Setups
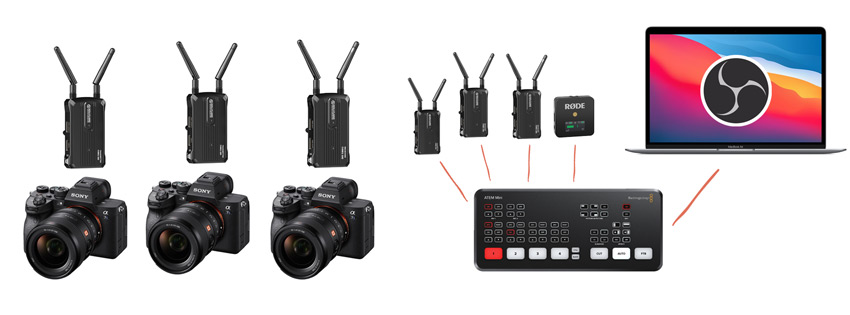
Kit #6
- 3 Cameras
- 3 Hollyland Pyro H 4K Kits (3 transmitters, 3 receivers)
- Wireless Mic
- Rode Videomic (backup audio)
- ATEM Mini Pro
- Laptop with OBS
This setup starts with a $1200-1400 investment for the Hollyland kits.
Then, the wireless system would range between $199 for the Rode Wireless Go, $299 for the Rode Wireless Go II, and $650 for the Sennheiser EW 112P G4. The basic investment starts at $199, all the way to $650 or more, depending on how many transmitters you need.
The ATEM Mini Pro sells for $495 and you will need to add your laptop to the kit. Since the ATEM Mini Pro is doing the encoding, you will receive the signal as a webcam source within OBS, reducing the workload for your computer. Don't have a laptop for this? You could get a Macbook Air with an M1 chip for about 900 USD.
In order to get this setup, the total price would start at $1900 including the Hollyland kits, Rode Wireless Go and Atem Mini Pro. It would go all the way up to $3450 for the Hollyland kits, Sennheiser EW 112P G4, ATEM Mini Pro, and a Macbook Air with M1 chip. Depending on the tools you already own, you can make it even cheaper or far more expensive with add-ons and more powerful components.
Kit #7
- 3 Cameras
- 2 Hollyland Pyro H 4K Kits (2 transmitters, 2 receivers)
- Wireless Mic
- Rode Videomic (backup audio)
- YoloBox Pro
Last but not least, this is a killer combo that doesn't require a laptop to go live.
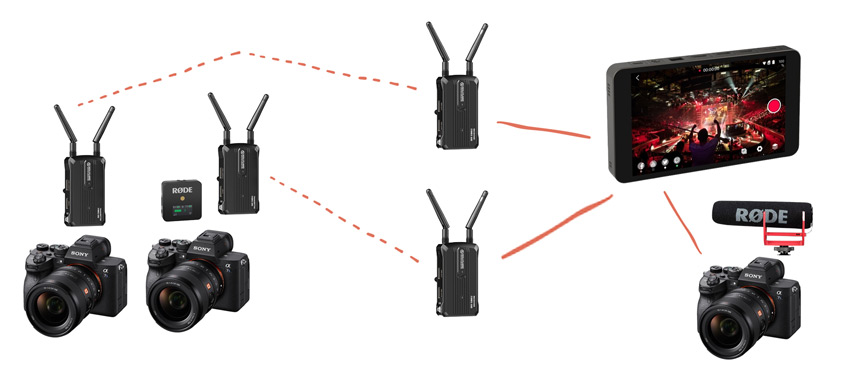
The Hollyland Mars 300 Pro kits would set you back 800-950 USD. The wireless Mics range all the way from $199 to $650, just like the previous option, and you can replace the ATEM Mini + Laptop with a YoloBox Pro ($1299).
Starting price would be $2300 for the basic parts, and $2900 for all the best components.
